Showing posts with label Frugal Living. Show all posts

Monday, November 12, 2012

Spa Birthday Party Fun!


For Kaitlyn's 10th birthday she wanted to have a spa party. We searched on Pinterest and found a lot of great ideas. We made our own invitations and sent them out three weeks in advance, put together these simple and fun goodie bags filled with lotion, lip gloss, and nail polish, and we made our own Oreo pops and cookies and cream cupcakes.  We also found some cute and free printable place cards.


The Oreo pops looked so cute as cupcake toppers, but as the cake began to come to room temperature, the Oreo pops began to fall over. If I ever do this again I will try finding shorter sucker sticks or simply keep the Oreo pops and cake separate. A friend of mine suggested using a harder icing to help hold the sticks in place as well. This particular cake is topped with homemade whipped topping and it simply wasn't strong enough to act as a "glue" to hold the Oreo pop in place, but I really liked the idea of a cookies and cream cake paired with the Oreo pops.

We had three spa stations which included places for the girls to enjoy a manicure, pedicure, and a facial. We purchased three black dishpans for around $2.00 each and some inexpensive bath salts, some fun nail polishes, and sliced up some cucumbers for the eyes. I cannot stress to you enough how incredibly simple this was and the girls all thought it was fun and special to celebrate a birthday in this way.


In our family the children are allowed to have friend parties every other year. We have enjoyed some fun parties this year, but I am looking forward to keeping things a little more low key in 2013. How about you? Do your children have friend parties every year?

Wednesday, November 23, 2011

Frugal Anniversary Celebration


For our anniversary last weekend, I made homemade Mostaccioli con Salscisia (a recipe from one of our favorite restaurants in Columbia, MO). If we would have gone to the Pasta Factory in downtown Columbia, it would have cost us $24.50 for two entrees and to make it at home it cost less than $10.00. We got to eat by candlelight, listen to some nice romantic Jazz, and we were never bothered by a waiter.

Do you ever enjoy date nights at home? This is an old post I wrote about sharing some ideas to have fun date nights at home and another post about how to do this successfully with young children. Now that our children are 10, 9, and 6, date nights at home have gotten a lot easier.

My husband and I have recently started something new with our date nights. One month we plan a special date night at home and the next month we get a babysitter and go out. This is really working for us and we enjoy having this special monthly time carved out for just the two of us. Do you and your spouse carve out special time for one another on a regular basis? How do you make date nights special in your home?

Saturday, November 12, 2011

Frugal Birthday Celebration

We have never had HUGE birthday parties for our children. I think it's mainly because we live so far away from family. However, we do let them have a few friends over every other year. This year is the year of family only birthday parties. The children get to choose which parent to go out with on a birthday "date." I was so excited K chose me this year, because the past two years she picked her Daddy. I took her to the salon, out to eat lunch, and she got to go shopping with her own birthday money. It was a really fun morning for us and I was thankful for ways to make our outing a little more frugal.

Haircut (wash, cut, dry, and style) and mini manicure = $30. But I had $12 left on a gift certificate, so I only paid $18 out of pocket.

Lunch out = $8.09. I used a BOGO coupon.

Homemade Cake = $8.17


How do you keep birthday celebrations frugal in your home?


Thursday, October 27, 2011

Gifts for Jesus


It's time to fill shoe boxes for Operation Christmas Child, a ministry of Samaritan's Purse. Last year we were surprised at how much it cost to fill a box with quality items and pay the shipping. We wanted to fill more, but simply couldn't due to our family's budget. So we started planning ahead and bought gifts throughout the entire year and not just the week before the shoe boxes were due. When shoe box time came around this year we had a stash of stuff to work with. In January, I placed a large gift bag in a closet and wrote "Gifts for Jesus" on it. Throughout the year we went shopping for gifts to put in our shoe boxes and stored them in our bag. Since we spread out our spending this year we are going to fill more boxes than ever before. I also want our children to think about giving to others throughout the entire year and not just at Christmas time.

So, this is your reminder - go and fill some shoe boxes for children all around the world so they can hear about Christ. In doing this, you are truly giving a gift for Jesus. National Collection Week is November 14-21. Click here for a list of drop off locations.


Friday, September 30, 2011

Money Saving Secrets of the Amish by Lorilee Craker

Lorilee Craker's "Money Saving Secrets of the Amish" is a fun and enjoyable read. Craker writes in a very conversational style which I actually enjoy. In this book you will not only learn secrets from the Amish, but Craker also shares how her own family have put some money saving secrets in action and reaped the benefits. Our nation could learn a lot from the quiet and humble Amish society. The main lesson is to not spend money unless you have the money to spend. One of my favorite quotes from the book came from an Amish boat cover maker named Andy, " Use it up, wear it out, make do, or do without." Honestly, everything in this book is common sense, but these secrets have been lost in our materialistic society. Thanks to Craker, the secrets are now out and we should be wise, listen up and get busy simplifying! Would you like to learn how to stretch your money, live more simply, save, and share with others? If so, I recommend this book. It is a quick read and is available in paperback or Kindle form. I actually read this book on my laptop using a free download called Kindle for the PC.

Disclaimer: I received this book free of charge From BookSneeze for review purposes only. All opinions are my own.

Friday, October 8, 2010

Apple Jelly

I have made raspberry and strawberry jam before, but I have never made jelly. With all the leftover apple peelings and cores, I made apple jelly! I did a Google search for "apple peel jelly," and came across these instructions, and I modified them a little (that's just the way I usually do things).

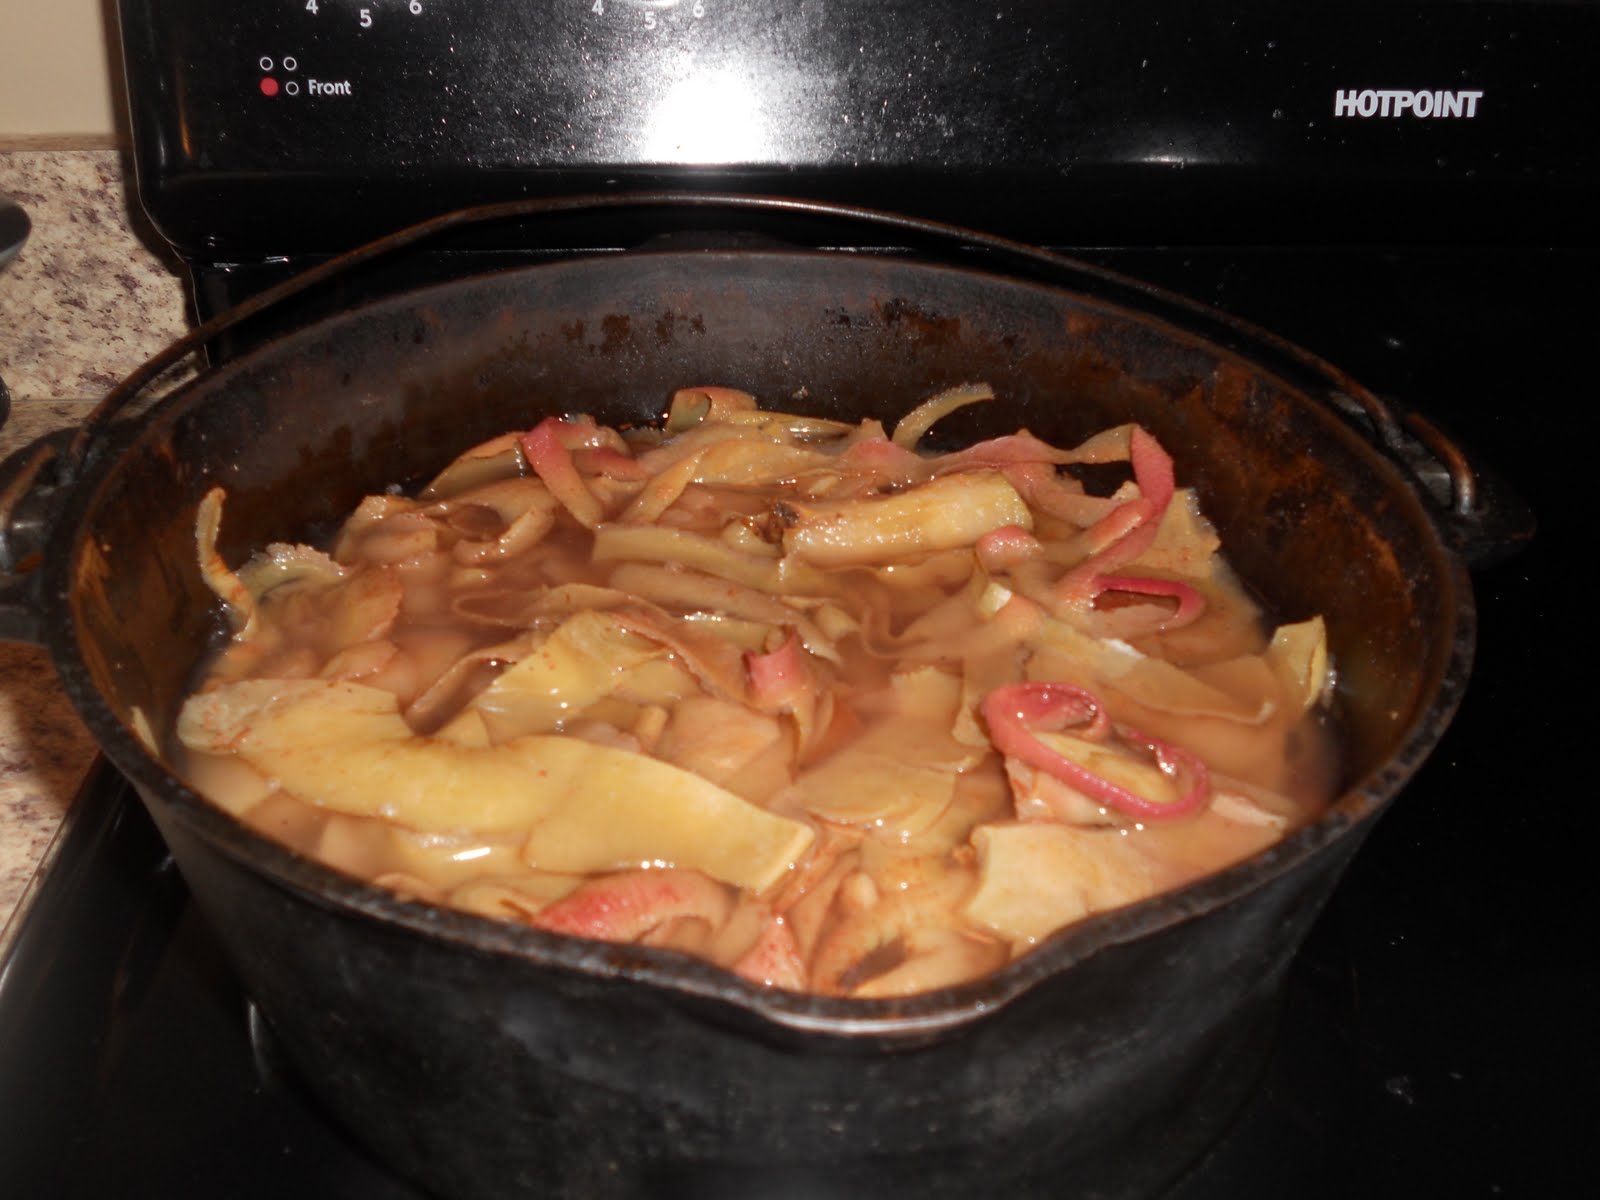
First, I filled my pot up with the leftover apple peels and cores, and added five cups of water, 1 tablespoon of cinnamon and one teaspoon of nutmeg (the original recipe suggested adding 1 cinnamon stick, but I didn't have any so I added the spices). I brought this to a boil, reduced the heat a little, and allowed it to boil for 15 minutes. I removed my pot from the heat and allowed it to sit overnight. I wanted to make sure I had plenty of juice the next morning to make the jelly so I added one more cup of water.


The next morning, this is what my pot looked like. I ran this through a jelly bag to get the required 5 cups of juice needed for this recipe. I did not use 7 cups of sugar like the recipe said, I only used 5, and I also let the jelly boil for 2 minutes instead of 1.


I ended up with a total of 4 1/2 pints of jelly, and it is good! I processed in a hot water bath for 10 minutes.

I have another gallon Ziplock bag of peels and cores in my refrigerator now. I am thinking about putting them in the freezer in case I decide to make some apple syrup for pancakes or maybe some more jelly. Do you have any other suggestions on how to use apple peels and cores?

I still want to dehydrate some apples, but we're going to have to go back to the orchard before I do that!

Thursday, October 7, 2010

Apple Butter

I purchased a 1/2 bushel of seconds of Jonagold apples to use to make apple butter (We used the ones we picked to eat and make apple dumplings). A couple years ago, a friend of mine shared her method of making apple butter in the crock pot with me and this is how I've made apple butter ever since.

First, wash, peel, and core your apples, and cook them in a pot on the stove with some water until they are soft. I filled my 5 quart cast iron pot with apples and added 1 cup of water, put the lid on and cooked for about 20 minutes. Once they were done, I put them in the crock pot. I cooked up two batches in my cast iron pot to fill up my crock pot like you see in the picture below. This was approximately 1 peck of apples in my crock pot (1/2 of what I purchased). I added 2 cups of sugar, 1 1/2 Tablespoon of cinnamon, 1 teaspoon of ground cloves, and 1 teaspoon of nutmeg. The amount of sugar you add depends on the type of apples you use, and the spices are all what your family prefers. The apples can be easily broken up and mashed with a potato masher, and if you want you can use a hand held mixer.


I started cooking the apple butter in my crock pot around 4pm on a Saturday evening on low. I turned it off when I went to bed around 10pm, and then turned it back on before we left for church and let it cook all morning and afternoon. You want your apples to reduce by half, and it is important to let it cook with the lid removed to allow the extra liquid to evaporate. By around 5pm on Sunday evening, I began the canning process. I processed the apple butter for 10 minutes in a hot water bath canner.

I ended up seven 1/2 pint jars with this batch. I repeated this process again, and ended up
with a total of 8 pints of apple butter from a 1/2 bushel of apples.


Crock pot apple butter is so easy. You can adjust this recipe to suit your family's tastes, and this also makes your house smell wonderful!

Wednesday, October 6, 2010

Picking Apples

This weekend we spent some time picking apples.


A lot of the apples were very high, but we tried our best to fill our baskets.

When we got home, we washed our apples and began making apple butter. I'll post more about that later.


Thursday, September 30, 2010

Applesauce

On Tuesday, we took a field trip to an orchard, and then came home and canned applesauce! We chose Cortland and Gala apples and did a blend for our applesauce, and it tastes so good! It is only Thursday, and we have already consumed one pint and one quart of this yummy goodness! It is raining like crazy here today, but we hope to go out and pick some apples tomorrow so we can make apple butter, apple jelly, and apple dumplings. We'll wear our rubber boots, because I'm sure the orchard will be muddy!

Tuesday, June 8, 2010

Hanging the Sheets Out to Dry

I have 51 feet of clothes line at our new home. I tie it up when I want to use it, and take it back down when I'm done because this is the main area of the yard the children play things like Frisbee and football. My washer and dryer is in an unfinished room in our basement. We have to run a dehumidifier down there constantly (which uses a lot of energy) and of course dryers take a lot of energy. So, I'm going to try and dry more things on my clothes line to save energy (which means saving $). The less I run the dryer, the less energy I will use, and the less humidity it will add to the room, which in turn will allow the dehumidifier to run less. I have a little saying when I do things like hang clothes out on the line to dry instead of putting them in the dryer - I say: "That's very 'Little House on the Prairie!' " I love that show - don't you?


The little girls had a lot of fun running under the sheets today! My children truly help me see HUGE blessings in the tiny little things tucked away in our everyday lives! I am so thankful for the joy they bring into my life!


Wednesday, December 30, 2009

Menus - Planning and Pricing

We are getting ready to move out of a rental property and into our very own home! We are thankful, excited, and blessed! I always try to do a good job on our grocery budget but have lately felt the need to tighten things up a bit more so we have a little more wiggle room as we make the transition to being homeowners. I have been reading online a lot lately and here are some of my favorite websites I have found. I have really benefited from mygrocerydeals.com, $5 dinners, The Hillbilly Housewife, and Money Saving Mom. I honestly still do not understand all the ins and outs of couponing, but I am trying.

I am a HUGE fan of Aldi and shop there every two weeks! You can get tortillas for 99 cents and tomato soup for 49 cents! Anyway, you can in South Central Pennsylvania! I can just about tell you what everything in the store costs (well at least the items I buy regularly).

After reading over at the $5 dinner website, I really was curious to know how our dinners figured up. Today I went shopping with all the three children, and took the time to write down the cost of absolutely EVERYTHING I purchased today!

Here a few of the meals we will be enjoying over the next couple of weeks:

Chicken and Dumplings
1/2 chicken ($2.40)
1 can cream of chicken soup (.59)
flour (.28)
1 tsp. salt (pennies)
* I will make my own chicken stock by "stewing" the chicken in the crock pot overnight with salt, pepper, onion powder, and garlic).
This dinner will cost approximately $3.27 (plus whatever few cents in seasonings I will use).
This is my 7-year-old daughter's absolute FAVORITE meal!

Chicken Tortilla Casserole
1/2 Chicken ($2.40)
1/2 bag tortilla chips ($1.00)
Cream of Chicken Soup (.59)
Taco Seasoning (.33)
Green Chiles ($1.19)
This dinner will cost approximately $4.51
* I will also serve this with carrot sticks, broccoli and ranch dressing (I am guessing this will cost another .75-$1.00

Ham and Beans
Ham $1.65
Beans .99
Cornbread Muffins .95
Total Cost: $3.59

Homemade Pizza - I was very curious to figure this up. I make it every Saturday night for our family and we have it for leftovers on Sunday when we get home from church. I'm not crazy about pizza, but my family absolutely loves it!
Flour - .95 (I use King Arthur Flour, so this would be less if you used cheaper flour)
Cheese - ~$5.00
Pepperoni - $1.00
Sauce - $1.00
I honestly do not know how to figure in the cost of yeast, salt, and oil, but I believe it's safe to say we're talking about a few cents here (Okay, I do KNOW how to figure it up, but I'm just not willing). I buy my yeast in bulk for about $3 and it lasts me for MONTHS and I make homemade bread and pizza dough A LOT!
So, I'm estimating that I spend approximately $7.95 for 2 meals for my family, and my husband usually takes a couple slices with him to work on Monday morning! That's some cheap pizza!

I'll spare you all the rest of my boring figures, but it was very exciting, encouraging, and motivating to make my little list of prices today and figure up what each dinner costs for our family! I am certain that many of the dinners will have leftovers for lunch the next day, or at least enough for my husband to take leftovers to work with him. The children and I usually eat soup and/or sandwiches for lunch.